Do you like creating your own storage solutions for your home as much as I do? I have a small house and finding inventive ways to store things is like a 3rd hobby for me. Combine that with a main hobby of crochet and you have a quest to find unique solutions to keep stuff up and off the floor or table.
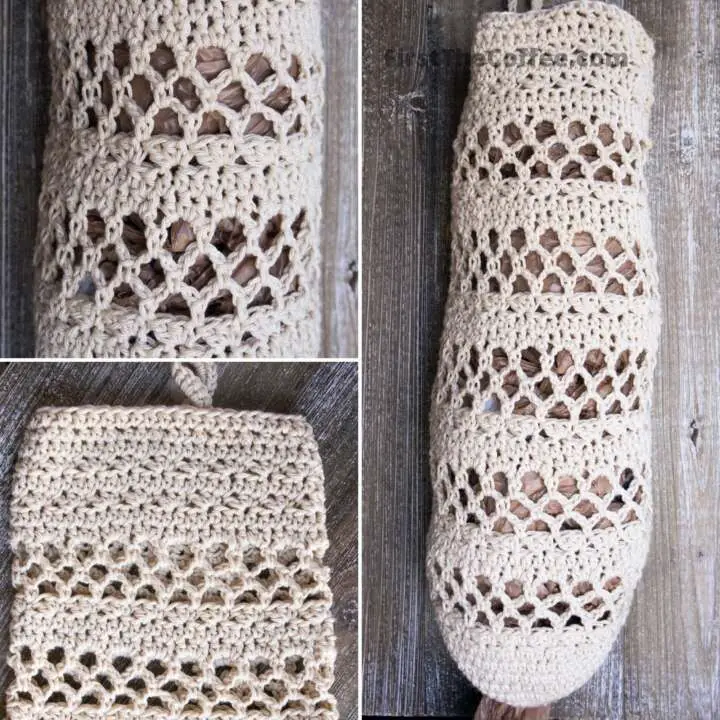
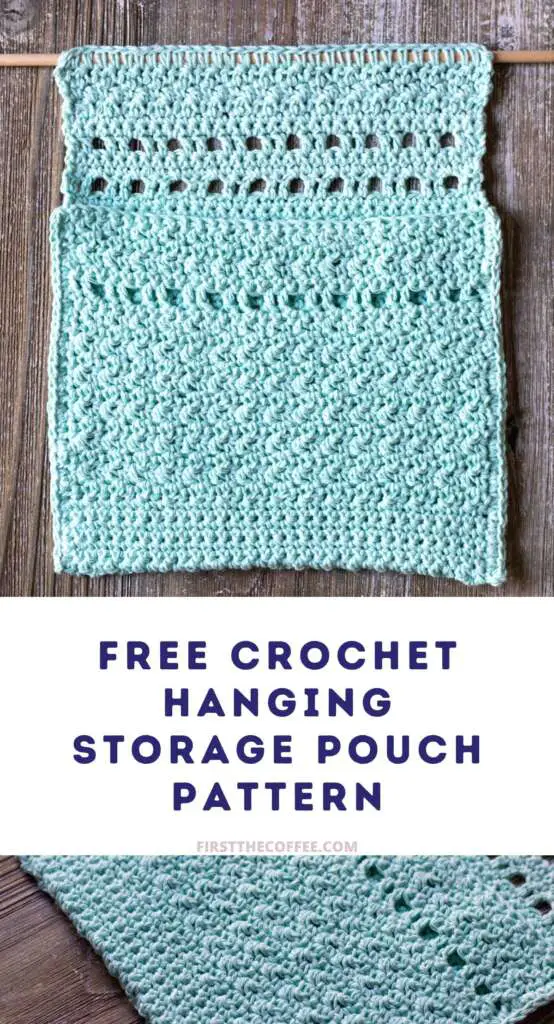
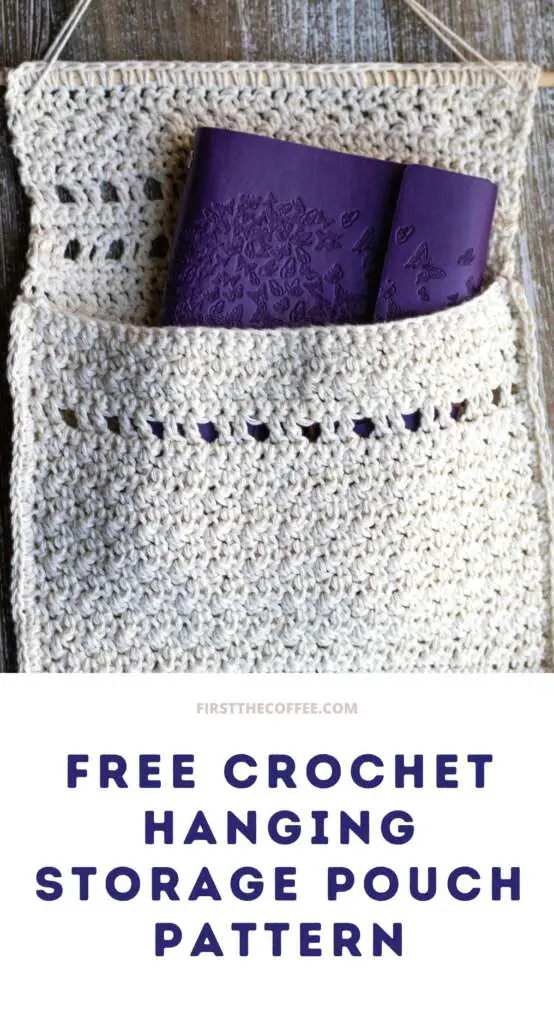
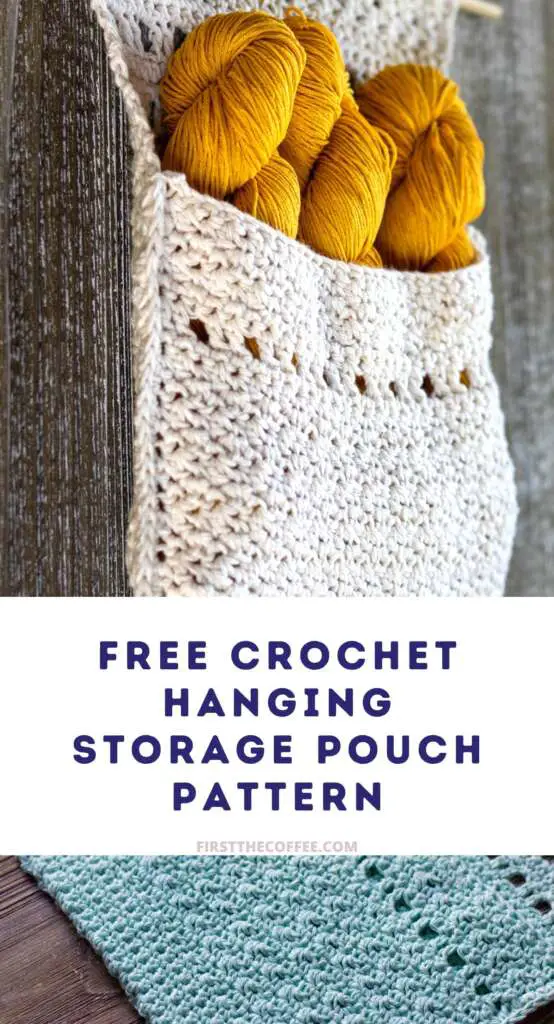
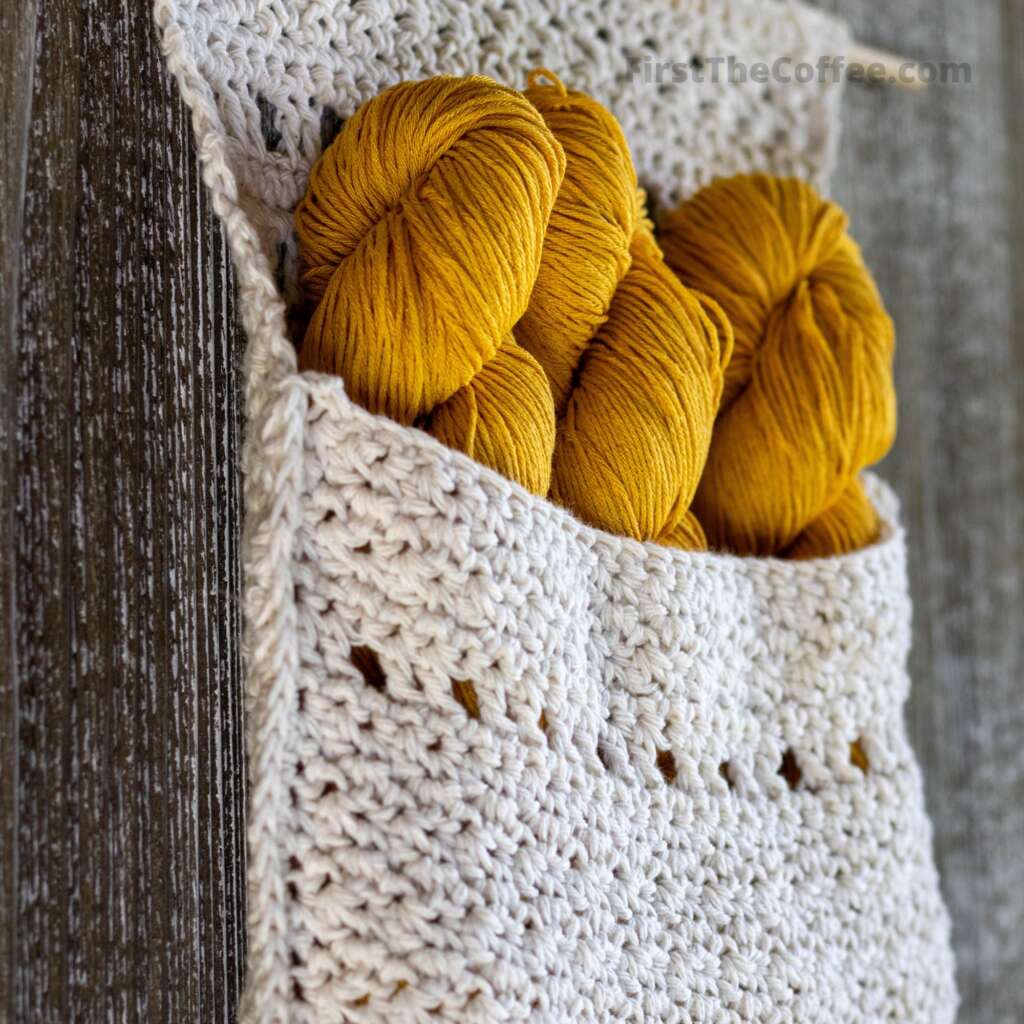
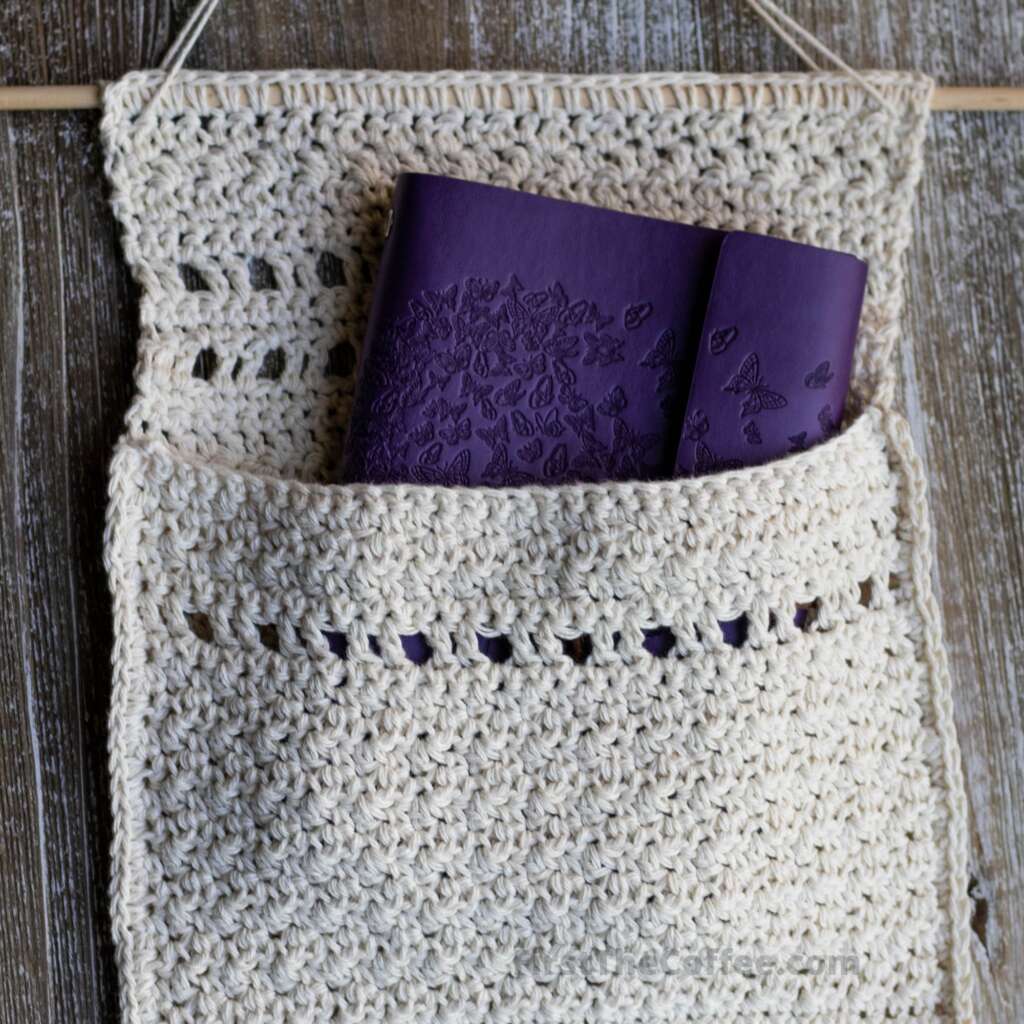
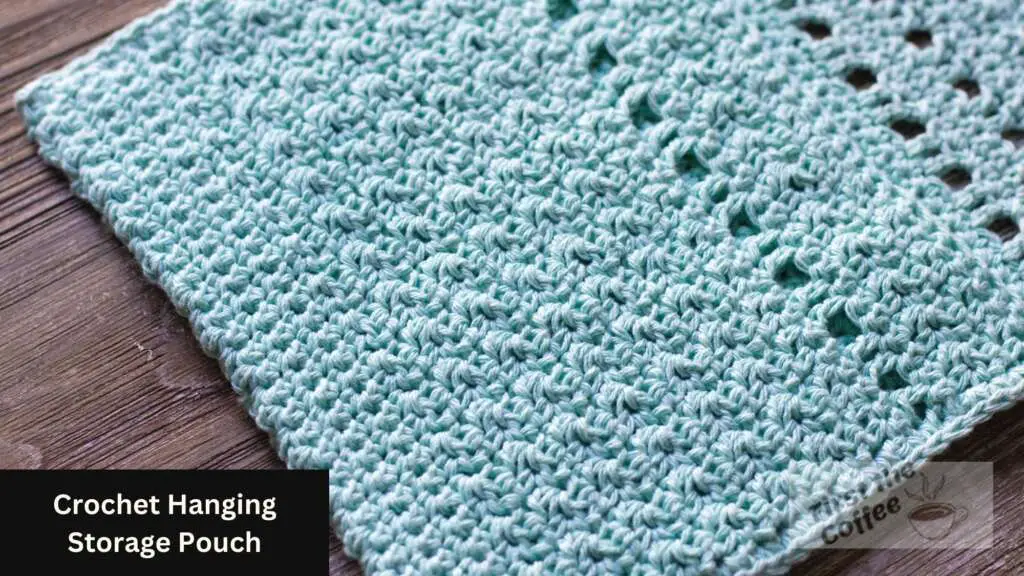
This crochet storage pouch is easy to make and requires only basic crochet stitches to create the beautifully textured look of the Lemon Peel Stitch. This pattern is a great option for those new to crochet and wanting to create some useful crocheted items for the home. The best part is that you can hang it anywhere you want, such as on a wall, a door, or a chair. It’s perfect for keeping your essentials within reach and adding some charm to your space. Whether it’s your keys, phone, glasses, or pens, having a handy crochet hanging storage pouch to keep them in can make your life easier and tidier.
If you’re ready to start crocheting this hanging storage pouch, grab your hook and some yarn and follow the pattern below. You’ll be amazed by how quickly and easily you can create this cute and useful wall storage pouch.
Ad-Free PDF Patterns Are Available:
The full written pattern and video are available below with display ads. But if you would like a written ad-free PDF to add to your pattern collection you can do so by purchasing one from my Ravelry shop or Etsy shop.
All PDF Patterns are 20% off when you buy 3 patterns on Ravelry or Etsy.
Notes About the Crochet Storage Pouch Pattern:
- This crochet pattern is written in US terms.
- Initial chains in a round/row do not count as a stitch.
- To change size the foundation chain needs to be a Multiple of 3 + 2 that is even, + 1
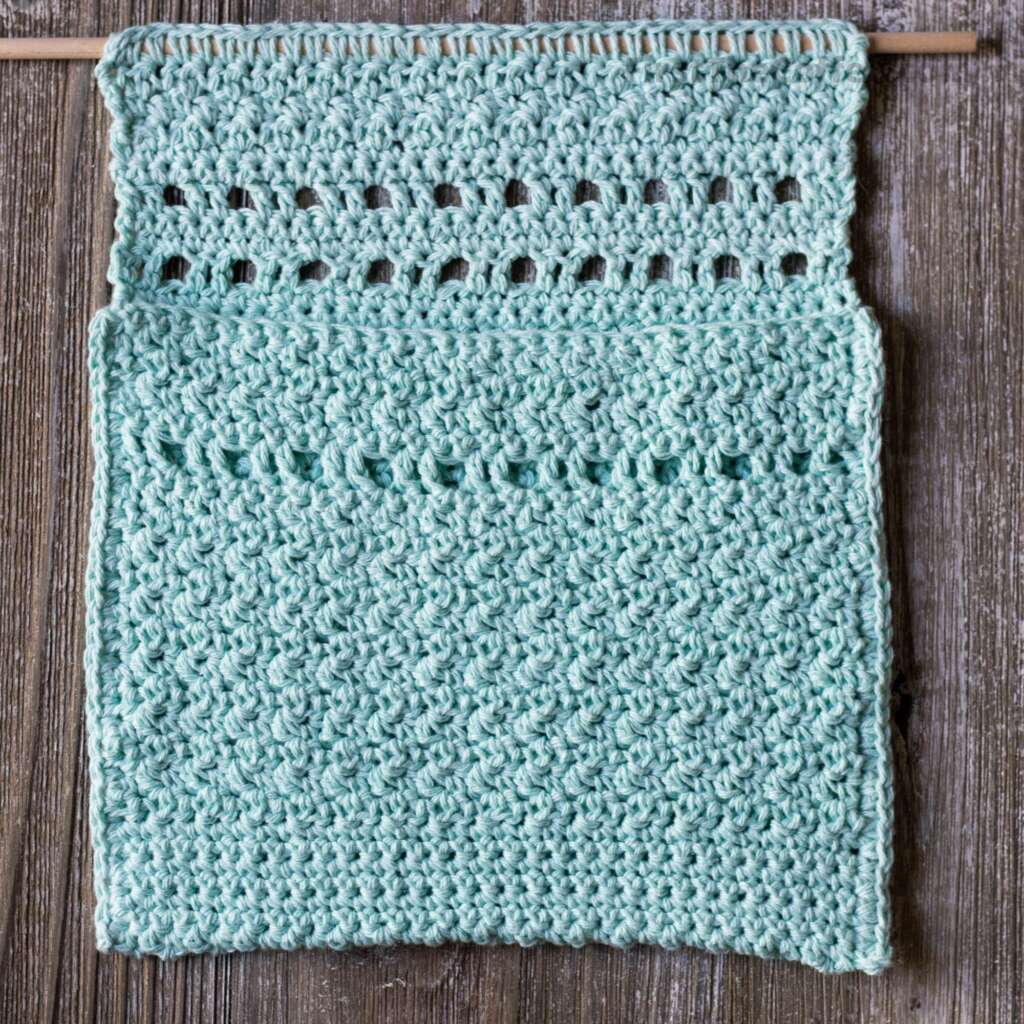
- Finished size is 11 inches tall x 9 inches wide.
Materials Needed to Make the Hanging Crochet Storage Pouch:
- 170 yards of a medium-weight #4 yarn (Yarn Used: Loops & Threads Capri Eco Cotton)
- 12” Dowel Rod
- 5.00mm (H) crochet hook
- Yarn needle to weave in ends
- Stitch markers (optional)
- Scissors
Crochet Abbreviations Used in this Pattern (US Terms):
- ch – chain
- st/sts – stitch/stitches
- sc – single crochet
- dc – double crochet
Crochet Storage Pouch Video Tutorial
Crochet Hanging Storage Pouch Pattern (With Pictures):
Basket Body
Foundation: ch 33
Row 1: sc in the 2nd ch from hook, sc in each chain all across
Rows 2: ch 1, turn, sc in the 1st st, dc in the next st, * sc in the next st, dc in the next st, repeat from all across
Rows 3 – 4: repeat row 2
Row 5: ch 1, turn, sc in the 1st st, sc in each st all across
Row 6: ch 2, turn, starting in the 1st stitch, * dc in each of the next 2 sts, ch 1, skip 1 st, repeat from * until 2 sts are left, dc in each of the next 2 sts
Row 7: ch 1, turn, sc in the 1st st, sc in the next st, * sc in the next ch sp, sc in each of the next 2 sts, repeat from * all across
Rows 8 – 19: repeat row 2
Rows 20 – 25: repeat Row 5
Rows 26 – 49: repeat Row 2
Rows 50 – 51: repeat row 5
Row 52: repeat row 6
Rows 53 – 54: repeat row 5
Row 55: repeat row 6
Rows 56 – 57: repeat row 5
Rows 58 – 60: repeat row 2
Attachment to Dowel Rod Directions With Pictures
Visual directions are also available in the video tutorial: https://www.youtube.com/watch?v=hljFcmVT3hI&t=848s
Turn work, and place the dowel rod on top of the stitches of Row 60.
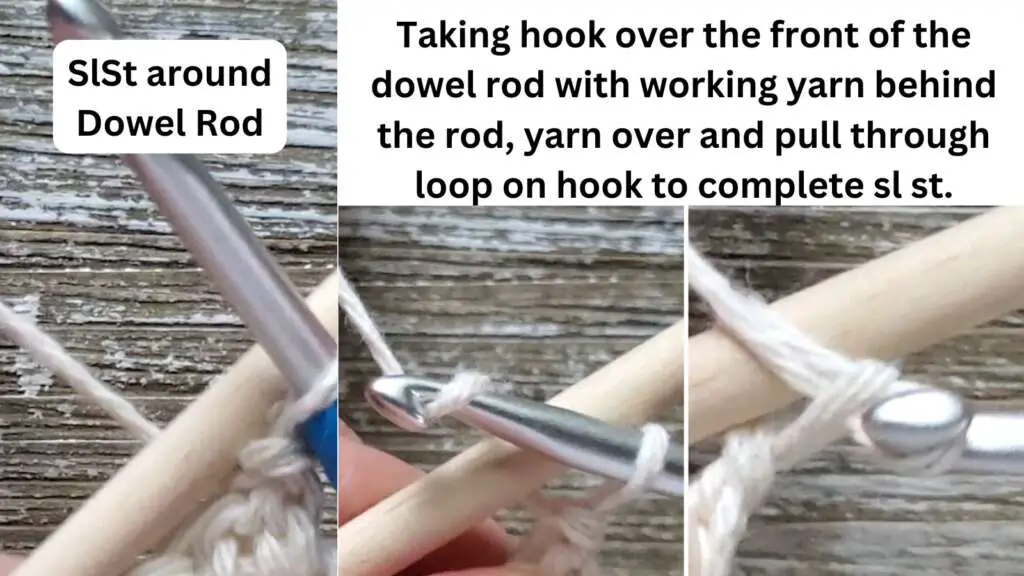
Your working yarn should be behind the dowel rod and the crochet hook still in the loop from the end of Row 60 on the front side of the dowel rod.
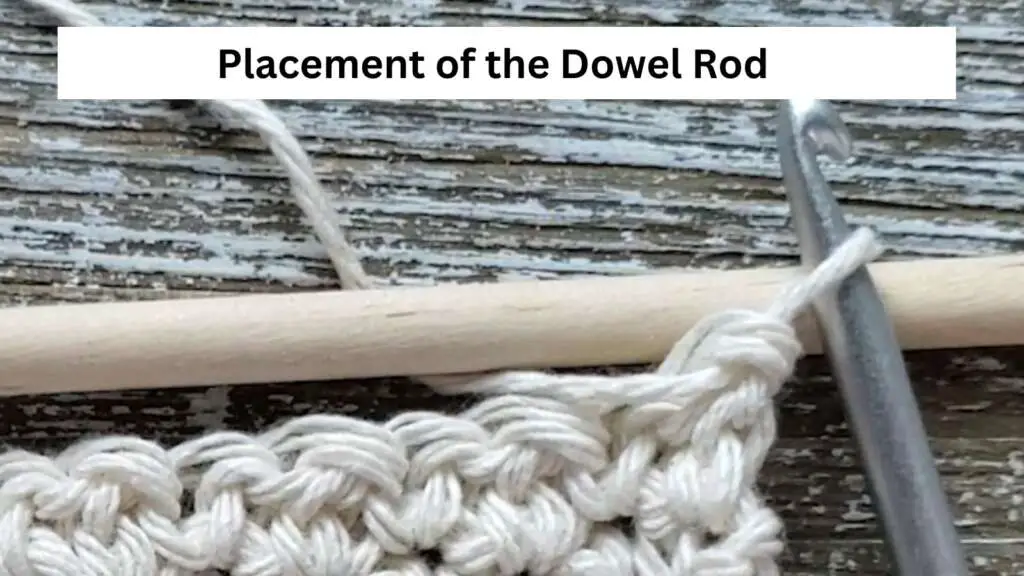
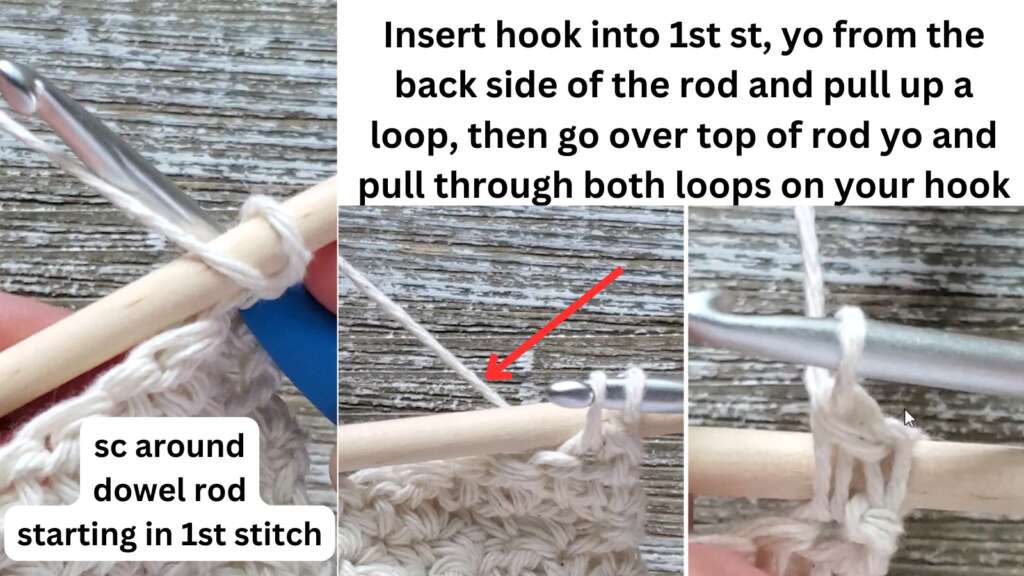
(Working around the dowel rod) sl st
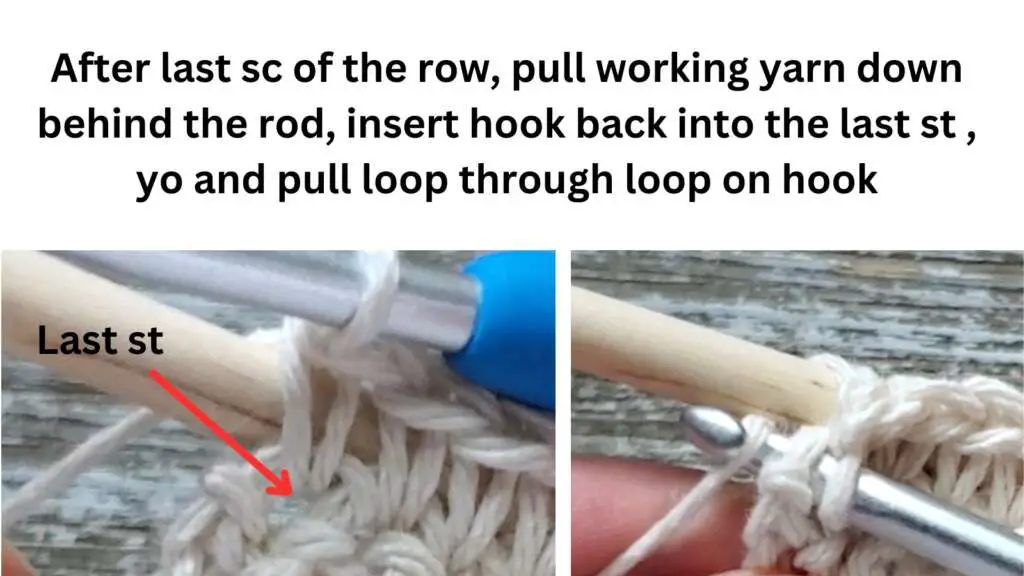
sc in the 1st st, sc in each stitch all across
After completing the last sc in the last st of the row, bring working yarn down behind the dowel rod and sl st into the last st that you just completed the last sc in
Fasten off end and weave in ends now or once finished.
Creating Pouch Directions with Pictures
Visual directions are also available in the video tutorial: https://www.youtube.com/watch?v=hljFcmVT3hI&t=1051s
With the dowel rod attached, lay out the rectangle that you have created, finding the top of the 6 rows of single crochets, begin to fold the bottom up so that what was the top row of single crochet stitches facing you is now the bottom row. This should cause the top of the pouch to align with the first single crochet row below the bottom of the 2 double crochet chain space rows.
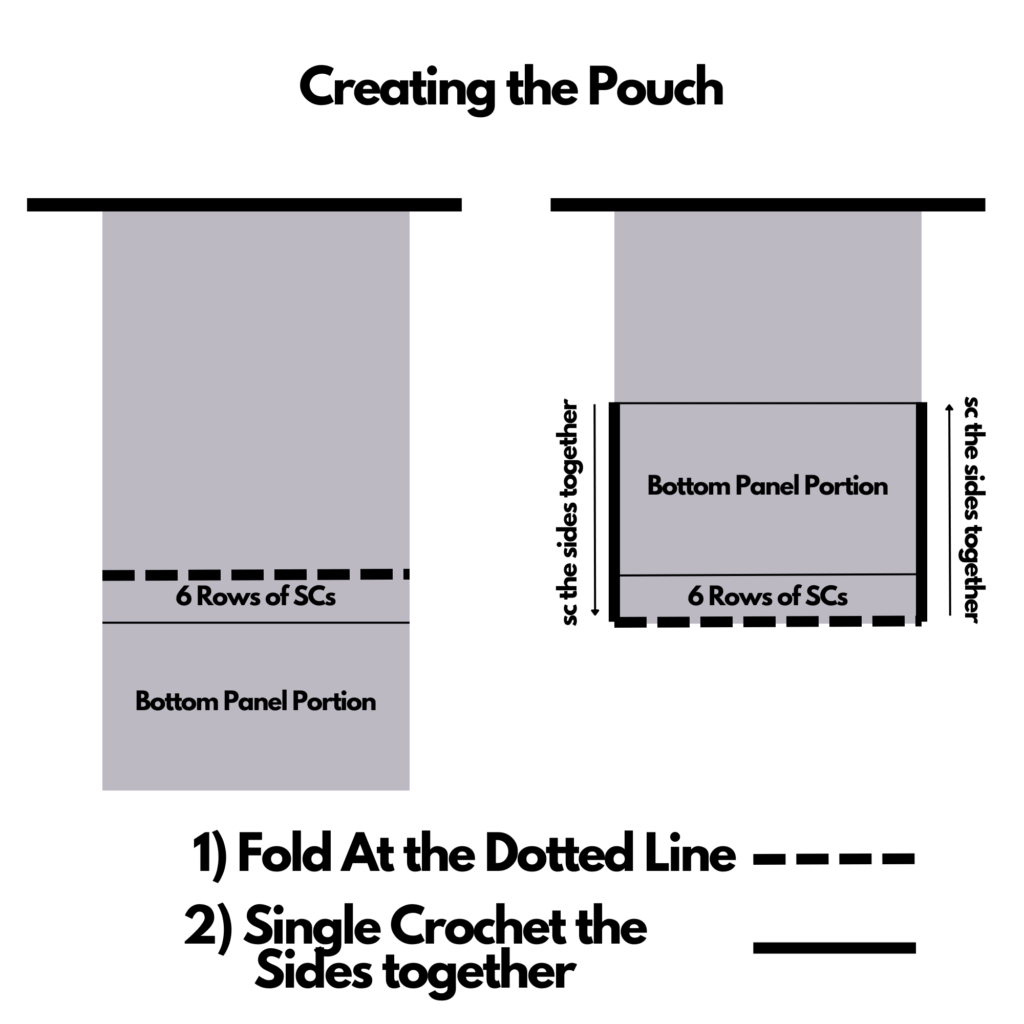
Starting on one side of the pouch at the beginning of the two sides meeting, sl st into first st of the sides (going through both layers) to secure yarn, starting in the same st, sc evenly down the side through both layers until you reach the bottom. Fasten off end.

Count the number of stitches done for this side.
Repeat the same process on the other side going in the opposite direction making sure to keep the same number of stitches.
Fasten off and weave in all ends.
Hanger
How you would like to hang this is entirely up to you.
You can hang this by using nails or hooks at each end of the dowel rod, you can create a braid or a chain to go across and attach to each end of the dowel rod.
Directions are available in the video for creating a simple yarn hanger by taking yarn and looping it through the end stitches below the dowel rod and then tying off at the top with 2 knots
Share Your Work
Have you made this pattern? Let us know by tagging @firstthe_coffee on Instagram. You can also join FirstTheCoffee’s Facebook Group and show off your crochet projects.
Copyright
You may not copy, make video tutorials of, or sell my patterns. You may not claim my patterns as your own. You can sell your finished items made using my patterns but please credit FirstTheCoffee.com by linking back to this pattern. You may not re-publish my photos as your own. If you are interested in using one of my patterns in a roundup post on your blog, you can use one photo and link back to the pattern on my blog. Do not repost/copy the pattern.