
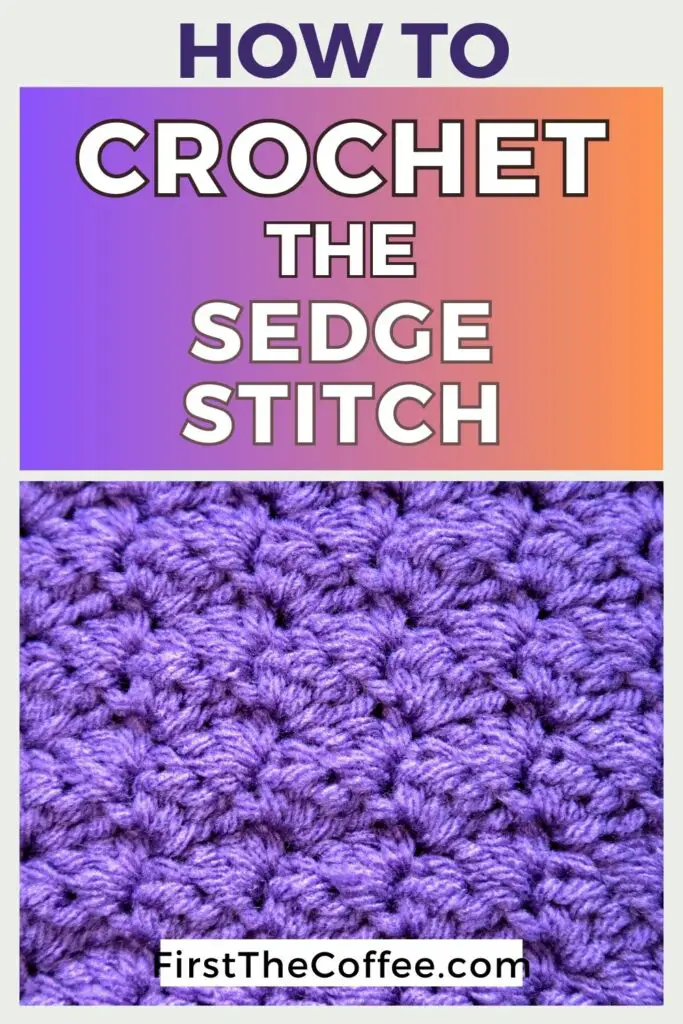
The Sedge Stitch is a beautifully textured crochet stitch that is used often in crochet patterns. It creates a slightly raised texture with an almost slanted shell look to the pattern. In this tutorial we are going to go over how to do the crochet sedge stitch step by step.
Many sedge stitch tutorials will have you start with a chain one and then do a half double crochet and double crochet into the first stitch of the row. I find that this can lead to bunching on the sides and curvature on the top of the pattern, especially if the tension of the yarn is tight. Instead, when I do the sedge stitch, I start my row off with a single crochet after the chain 1.
How Do You Do A Sedge Stitch?
In crochet, the sedge stitch is done by working three different stitches into the same stitch. In one stitch, you do a single crochet stitch, half double crochet stitch, and a double crochet stitch. After completing these three stitches, you then skip two stitches and repeat the process. Once you get to the end of the row, in the last stitch of the row you do only a single crochet stitch.
Sedge Stitch Crochet Tutorial Video
Crochet Patterns That Use the Sedge Stitch
- Easy Crochet Cat Mat
- Combo Stitch Crochet Dishcloth
- Combo Stitch Crochet Dishtowel
- Farmhouse Crochet Plastic Bag Holder
How to do the Crochet Sedge Stitch Step by Step

Instructions
- Create a foundation chain with a multiple of 3 + 2 chains
- Single crochet into the second chain from your hook.
- In the same chain complete a half double crochet stitch.
- In the same chain complete a double crochet stitch.
- Skip 2 chains.
- In the next chain, complete a single crochet, half double crochet, and double crochet stitch.
- Repeat steps 5 and 6 until there are 3 chains left on the foundation chain.
- In the last chain, complete a single crochet stitch.
How to do the Sedge Stitch in a New Row:
- Chain 1 and turn your work.
- Starting in the first stitch of the row, complete a single crochet, half double crochet, and double crochet stitch all in the same stitch.
- Skip 2 stitches.
- Repeat Steps 2 and 3 all across the row.
- When there are 3 stitches left in the row, skip 2 of the stitches and single crochet in the last stitch of the row.