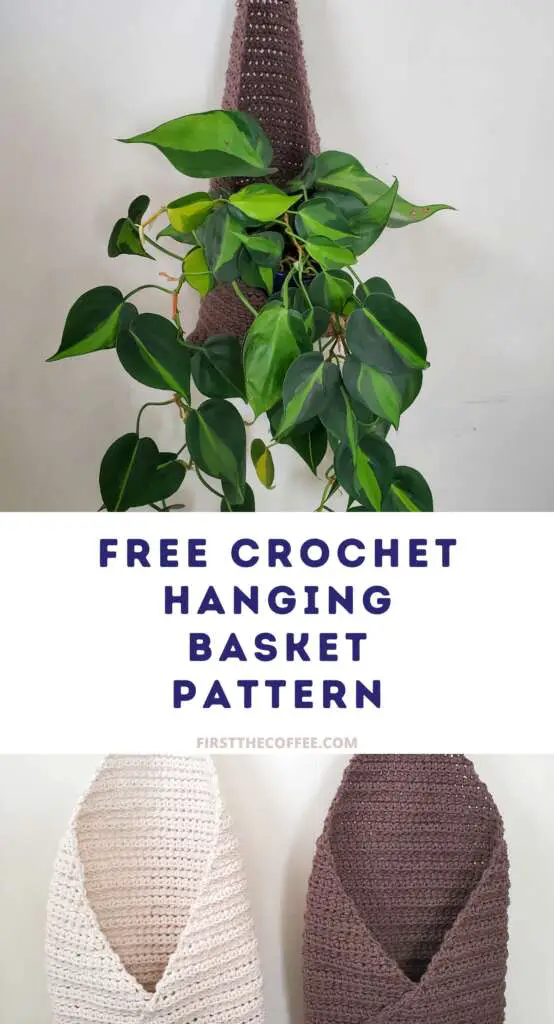
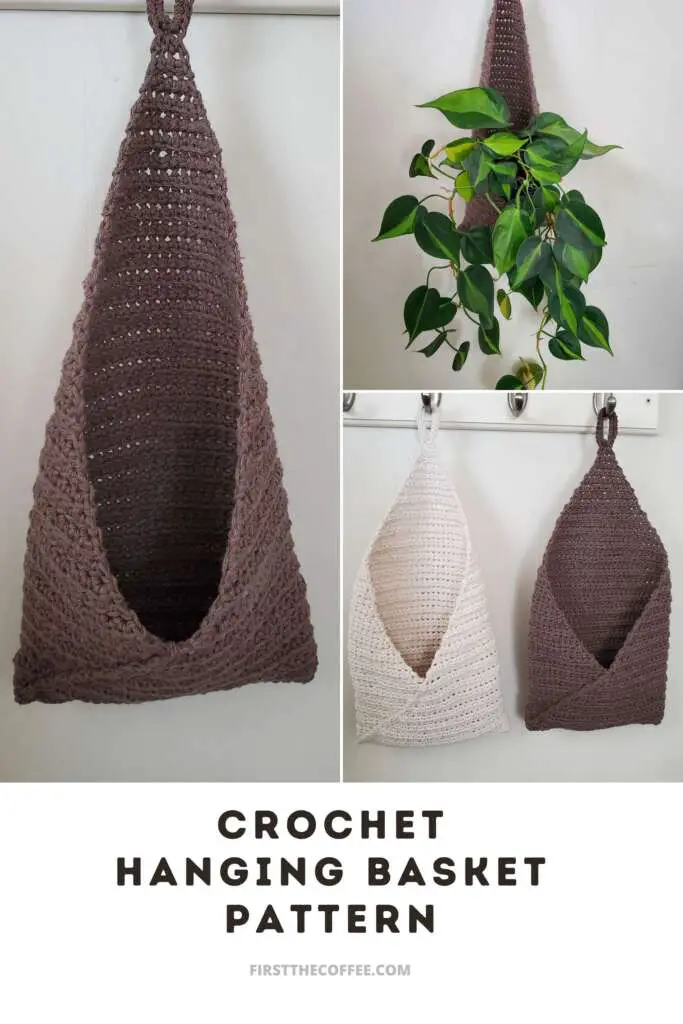
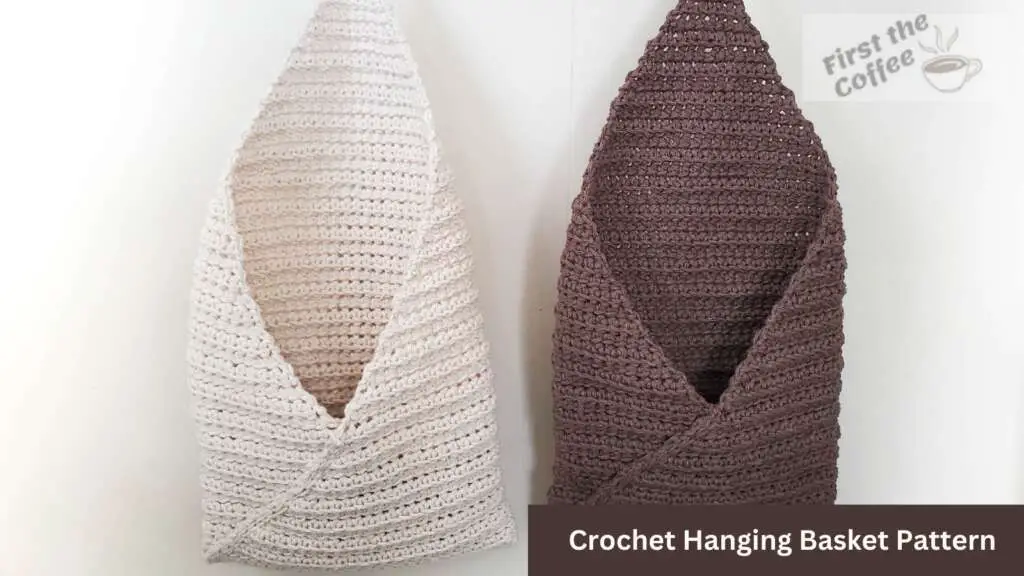
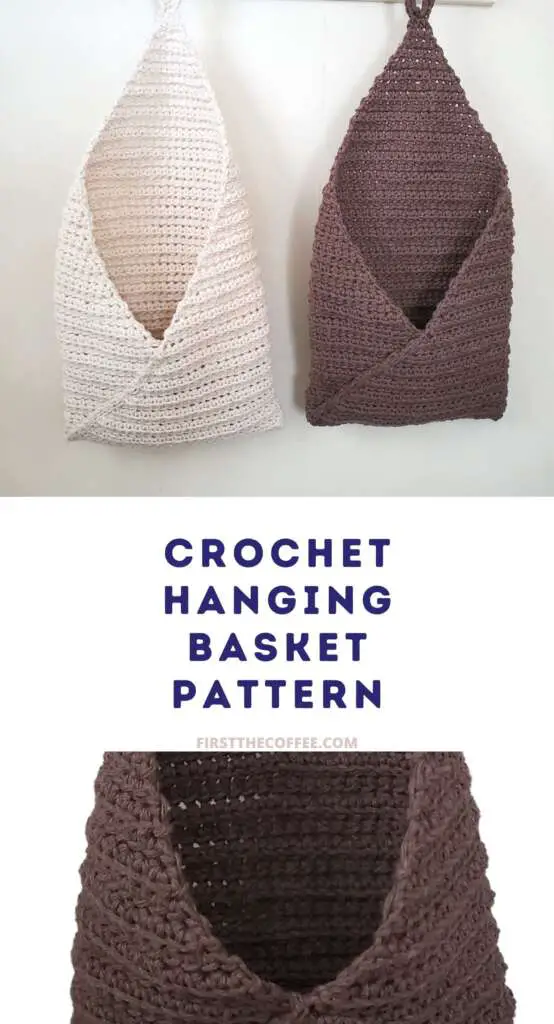
Crochet hanging baskets are a fantastic way to add a touch of handmade charm to your home decor. Not only are they a practical storage solution, but they can also serve as a beautiful decorative element that can elevate any room.
With this DIY Crochet Hanging Basket Pattern, you will learn how to create a crochet hanging basket that is not only functional but also stylish. The basket itself is 7 inches wide and 13 inches tall, and the ring that it uses to hang is another 2 inches in height.
Crochet Plant Pot Cover Pattern
I created this using the Linked Half Double Crochet Stitch, which is a modified version of the regular Half Double Crochet Stitch. If you aren’t sure how to do this stitch, that’s OK! You can find a step-by-step written guide and video tutorial for this stitch here: Linked Half Double Crochet Stitch.
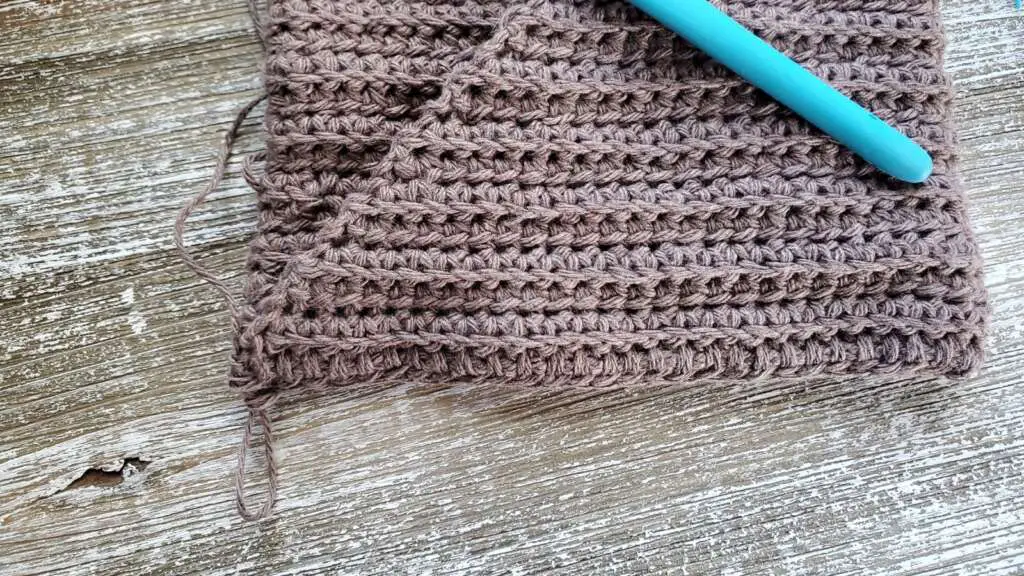
Even though this is a stitch that isn’t used too often, this is still an easy level crochet project. It is created by first making a ring with a chain and then creating a durable ring to hang the basket with by working single crochets around that foundation ring. The body is then worked in the shape of a triangle directly off of the bottom of the ring. The body is then folded into thirds and the seams are stitched using single crochet, half double crochet, and slip stitches. No sewing is required to put this basket together. However if you would prefer to sew the seams together instead of using crochet stitches, that can be done as well.
DIY Crochet Hanging Basket Pattern PDF:
Ad-Free PDF Patterns Are Available:
The full written pattern and video are available below with display ads. But if you would like a written ad-free PDF to add to your pattern collection you can do so by purchasing one from my Ravelry shop or Etsy shop.
All PDF Patterns are 20% off when you buy 3 patterns on Ravelry or Etsy.

Please note that this post may contain affiliate links. You can read my full affiliate disclosure at the bottom of the page.
The Yarn
I used Loops & Threads Eco Cotton Yarn for this pattern, but you can use any yarn you would like. It doesn’t even need to be cotton yarn.
This yarn now appears to have been discontinued by Michaels, but there are some other options if you want something that is close to this yarn. You just need one that is cotton and polyester.
- Premier Yarns has one: Premier Home Cotton® Solids and Multis.
- Joann’s has a new one: Worsted Cotton Blend Yarn by Big Twist
Notes:
- This crochet pattern is written in US terms.
- The basket is worked all in one piece, the pattern is separated into 4 sections: Ring, Body, Bottom Seam, and Diagonal Front Seam.
- Sewing is not necessary to connect seams, but you can do this as an alternative to the crochet stitches used in the pattern to join them together.
- Yarn needles will still be needed to weave in tail ends of yarn.
- Finished Size: 7 inches wide x 13 inches tall + 2 inches for ring
- When working the stitches for the bottom seam, keep tension tight.
Materials:
- ~ 185 yards of Cotton medium weight (4) Yarn (Yarn used: 2 Skeins of Loops & Threads Eco Cotton Yarn)
- 4.5 mm (7) crochet hook
- Yarn needle to weave in ends.
- Stitch Markers
Crochet Abbreviations Used (US Terms):
- Ch – chain
- sc – single crochet
- hdc – half double crochet
- Lhdc– linked half double crochet
DIY Crochet Hanging Basket Video Tutorial
DIY Crochet Hanging Basket Pattern:
Ring:
Foundation: Ch 12, sl st to 1st chain to join in circle.
Round 1: ch 1, sc 20 times around foundation chain (not in each chain), sl st to 1st sc to join
Basket Body:
Row 1: ch 2, hdc in 1st stitch, hdc in next stitch 2 times, turn
Row 2: ch 2, Lhdc in 1st stitch 2 times, Lhdc in each of the next two stitches, turn
Rows 3 – 41 : ch 2, Lhdc in 1st stitch 2 times, * Lhdc in next stitch, repeat from * all across until last stitch, Lhdc in last stitch 2 times, turn (each of these rows should increase by 2 stitches each row)
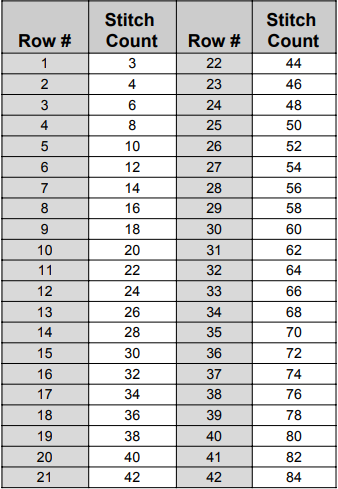
Row 42: ch 2, Lhdc in 1st stitch 2 times, * Lhdc in next stitch, repeat from * all across until last stitch, Lhdc in last stitch 2 times, DO NOT TURN
Bottom Seam:
Counting from where your hook is after finishing row 42, Place markers on stitch 28 and stitch 56:
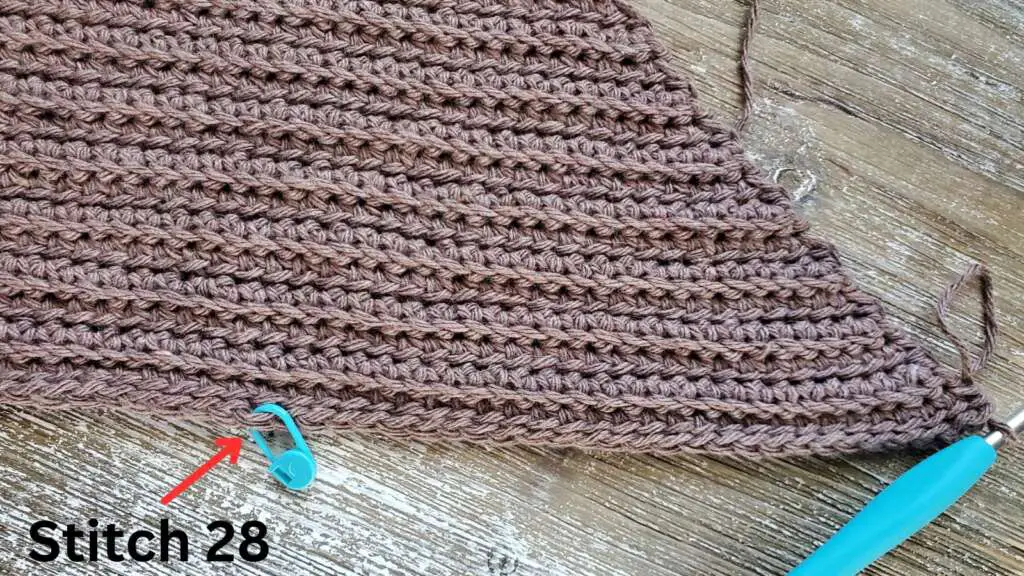
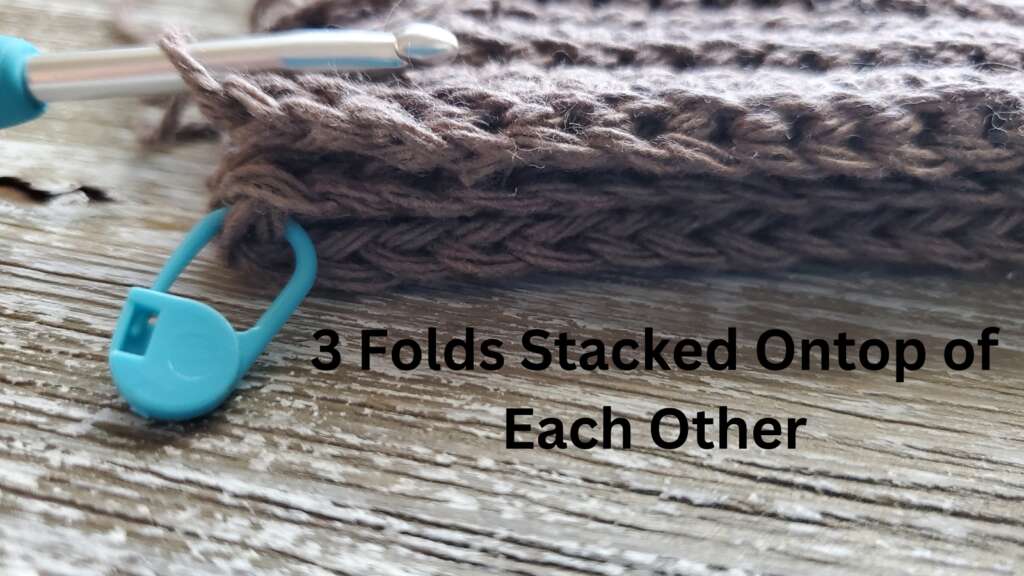
Starting with the opposite end of the triangle from where your hook is, fold the end over to where the last stitch of the row meets up with the stitch marker closest to your crochet hook:
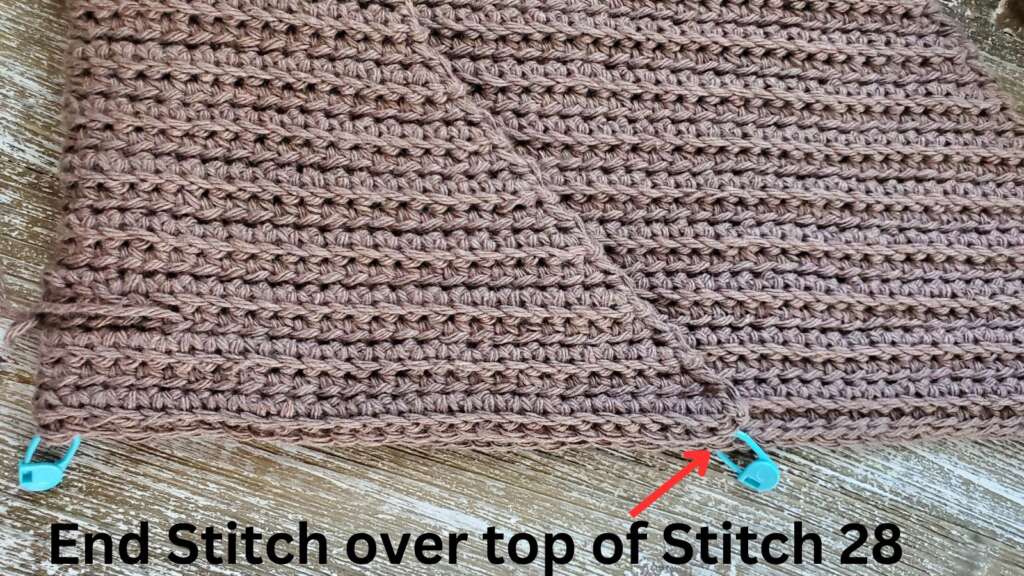
Then fold the other end (where your crochet hook is) over so that the last stitch you created in the row lines up with the stitch marker that is at the end of the fold that you just folded over:

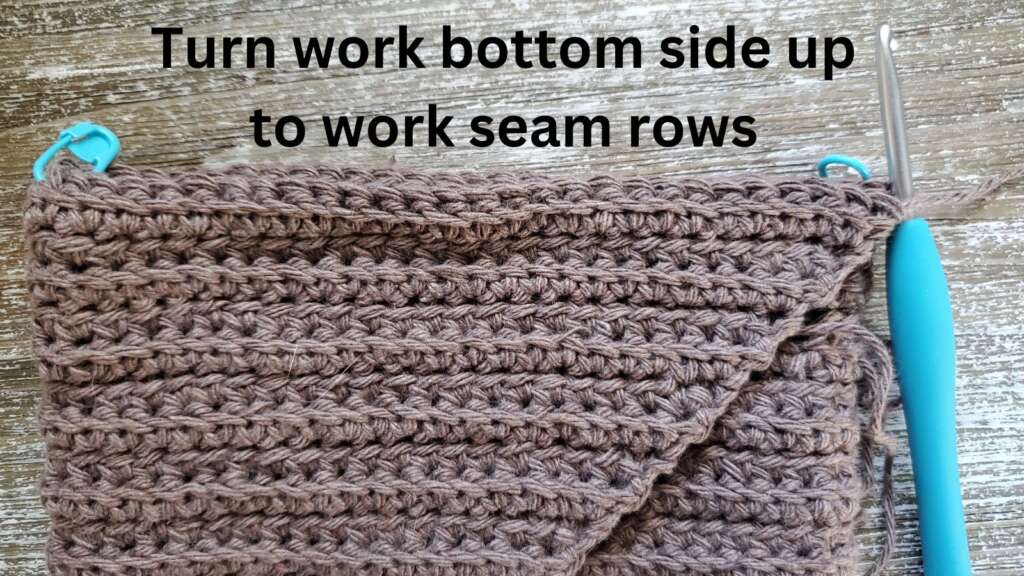
If needed, turn your work to where the bottom is now facing up and you can begin a new row.
Row 43: Insert your hook into the 1st stitch of the fold closest to you, and into the stitch right before the stitch marker, and through the stitch with the stitch marker, complete a single crochet.
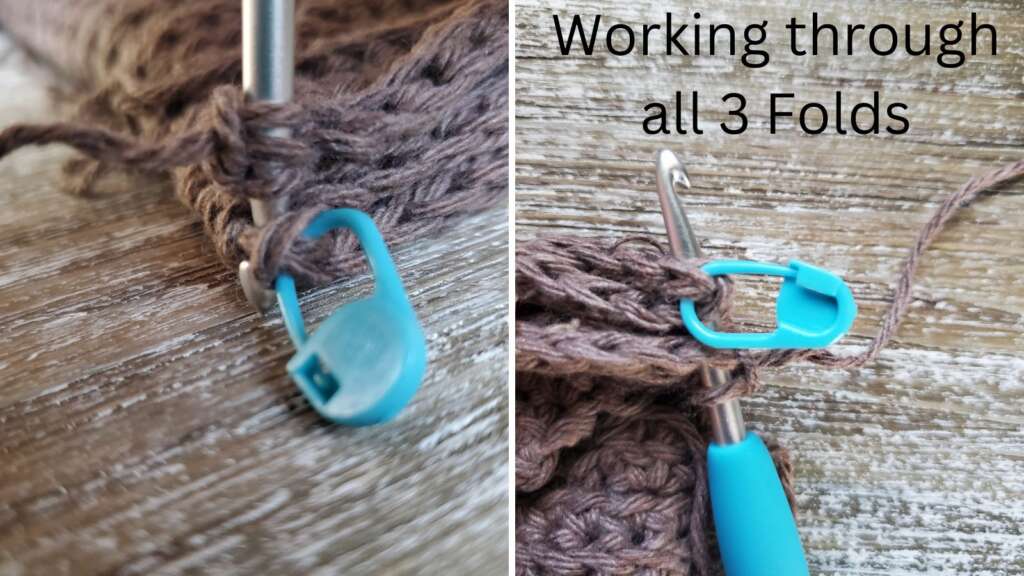
Keeping tension tight, complete single crochet stitches all across the bottom of the basket by inserting your hook into the next stitch and through all three layers that you have folded.
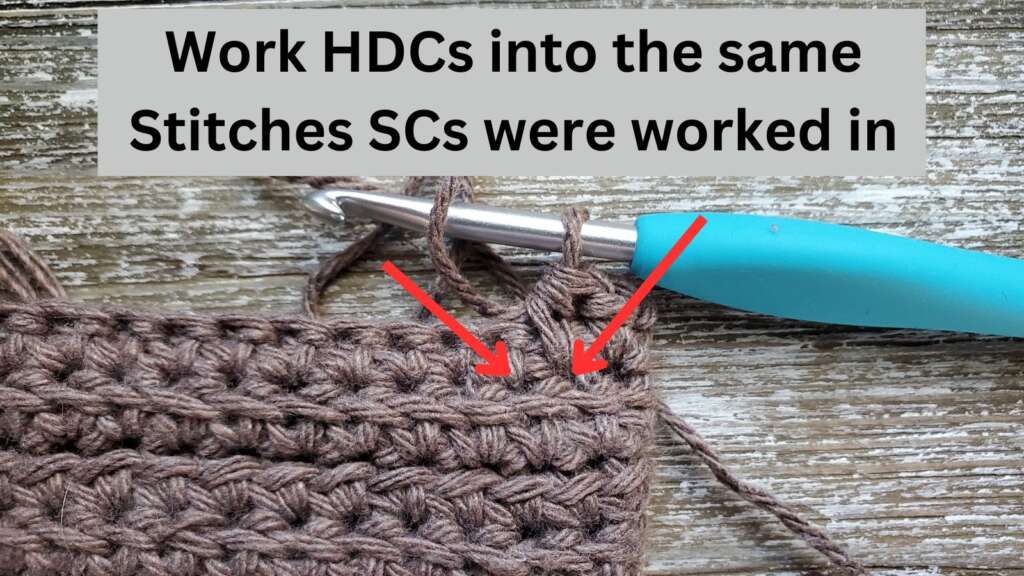
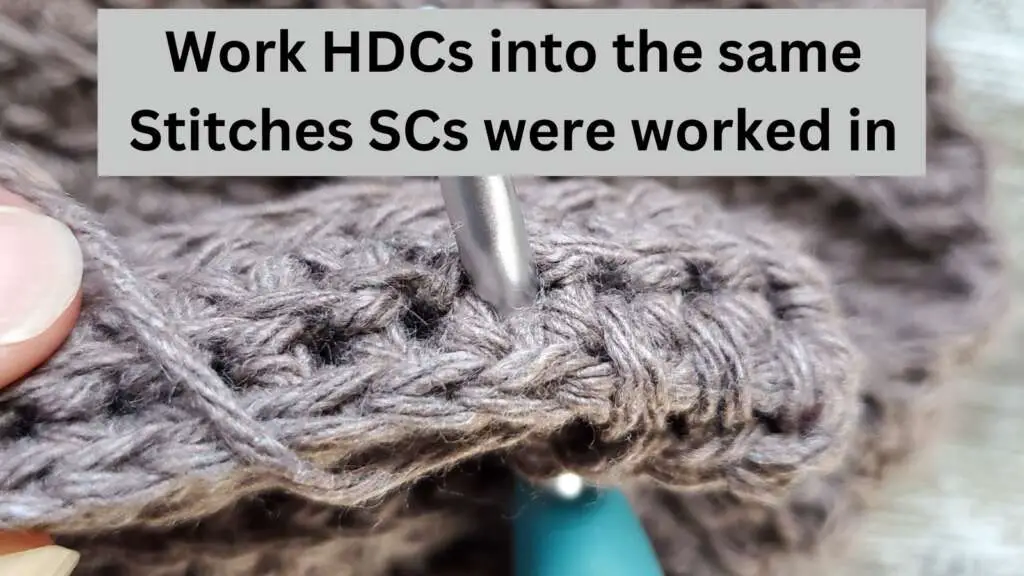
Row 44: ch 1, turn, hdc into same stitches that you used to create the single crochets in row 43, do this all the way across, do not turn your work at the end of this row
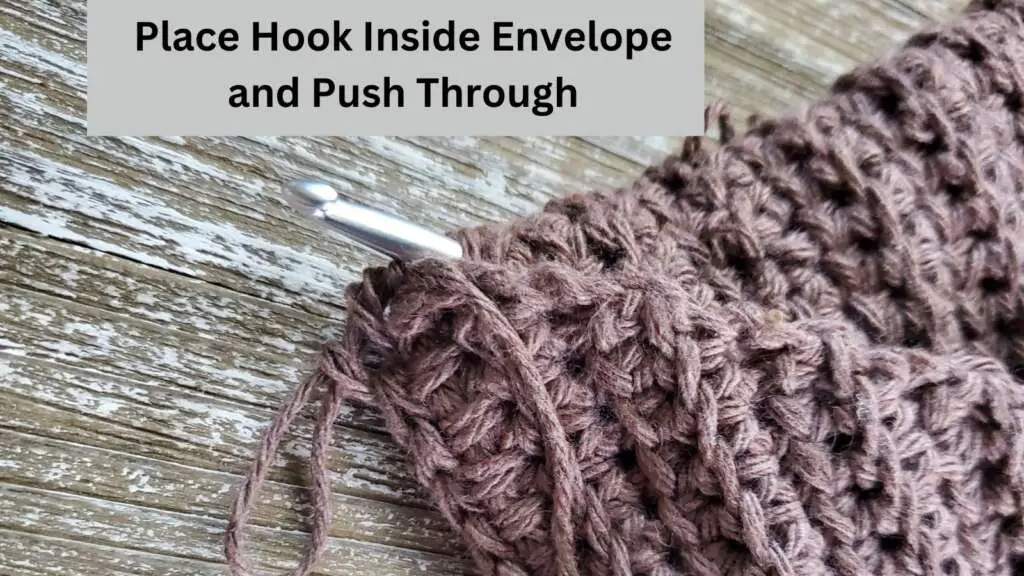
Diagonal Front Seam:
Step 1: Flip the project over so that the folded parts of the envelope are facing, cut off a long tail (about 30 inches long), pull your current loop out long ways and remove your hook.
Step 2: Place your hook into the inside of the envelope and push it through the closest opening in the corner to your current loop. Use your hook to pull the tail that you just cut off all the way through to the inside of the envelope. Make sure not to lose your loop. Take your crochet hook and place it back into the loop.
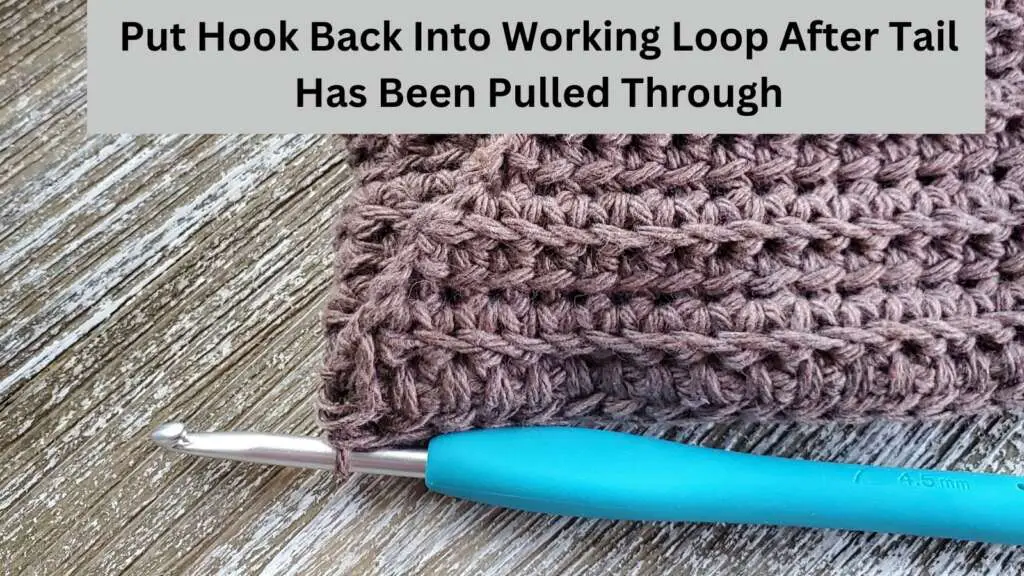
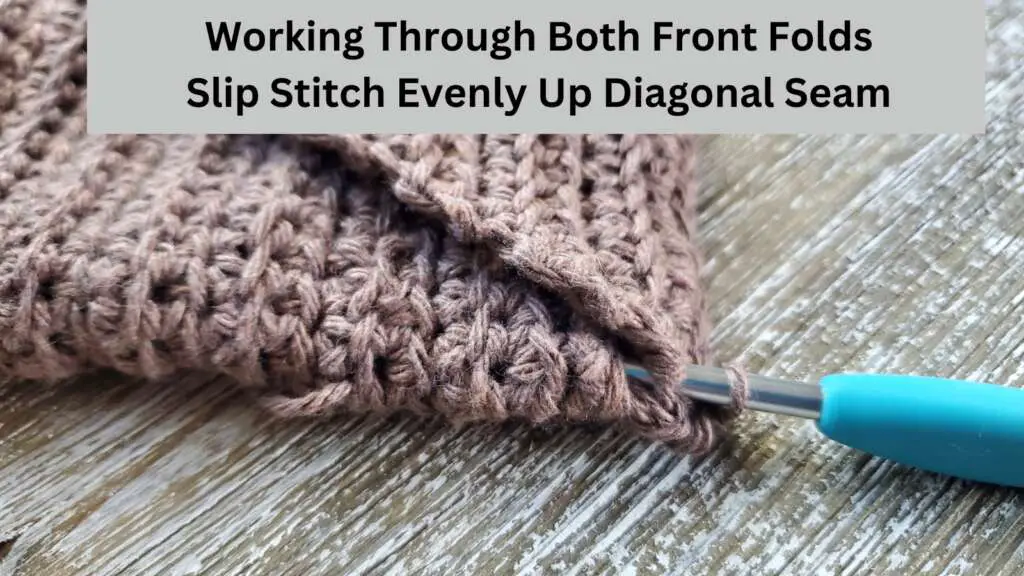
Step 3: Going up the diagonal seam, sl st by pushing your hook through the first and second folds and pulling up a loop with the tail that you pulled to the inside in the previous step. Sl st evenly up the diagonal seam connecting the two front folds together, at the end of the seam tie off and weave in your ends.
Share Your Work
Have you made this pattern? Let us know by tagging @firstthe_coffee on Instagram. You can also join FirstTheCoffee’s Facebook Group and show off your crochet projects.
Copyright Info:
You may not copy, make video tutorials of, or sell my patterns. You may not claim my patterns as your own. You can sell your finished items made using my patterns but please credit FirstTheCoffee.com by linking back to this pattern. You may not re-publish my photos as your own. If you are interested in using one of my patterns in a roundup post on your blog, you can use one photo and link back to the pattern on my blog. Do not repost/copy the pattern.