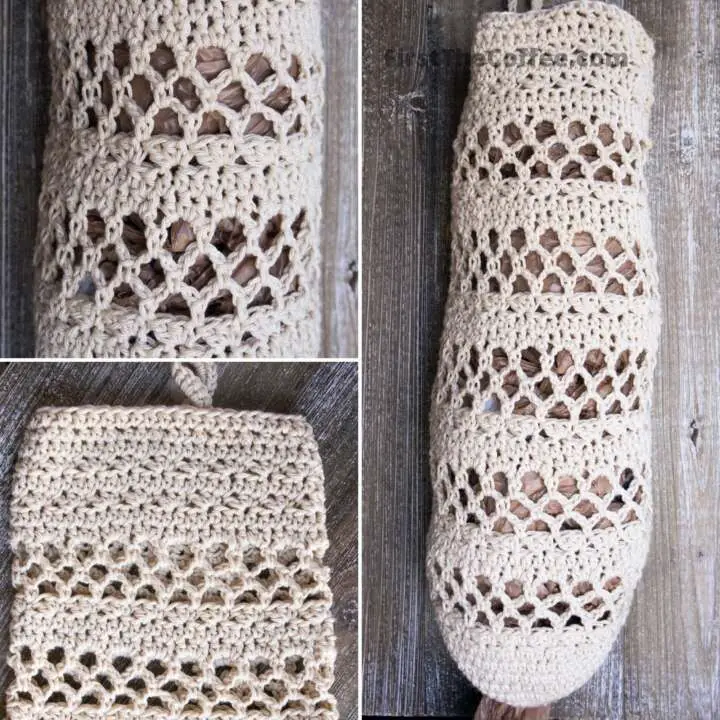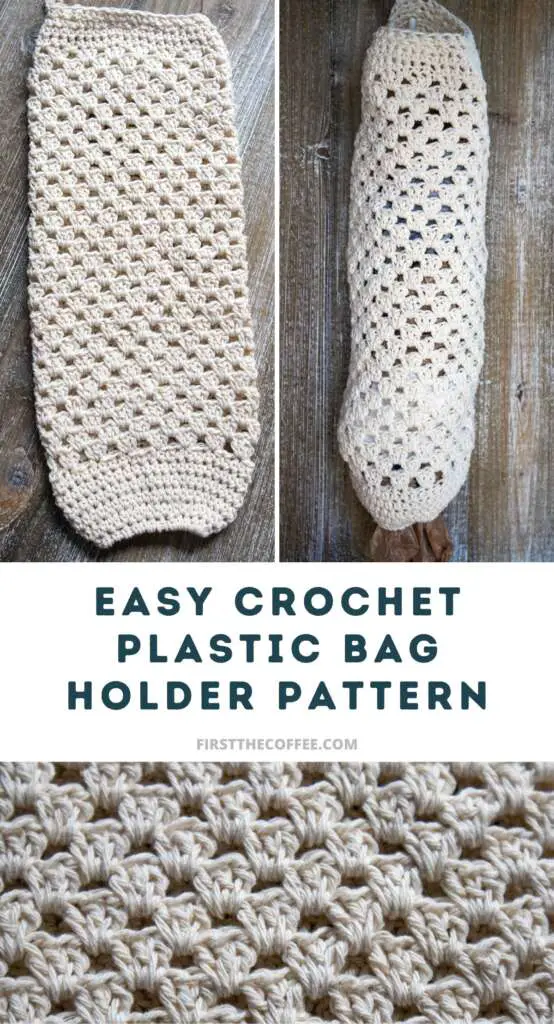

Tired of the clutter caused in your kitchen or pantry by plastic grocery bags you get from the store? Then this is the crochet solution for you. The “Granny Plastic Bag Holder” pattern — is an easy crochet pattern designed to help keep your extra plastic bags organized.
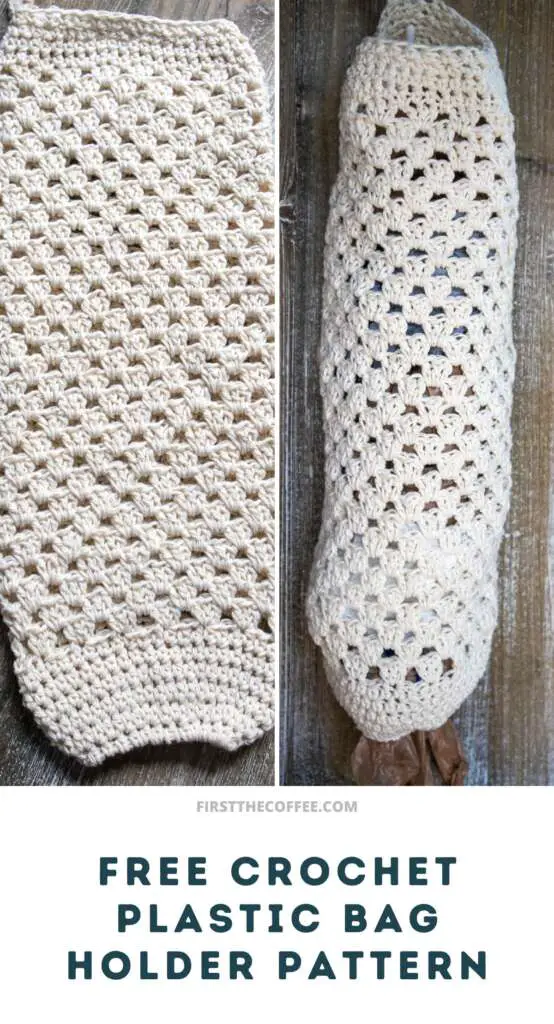
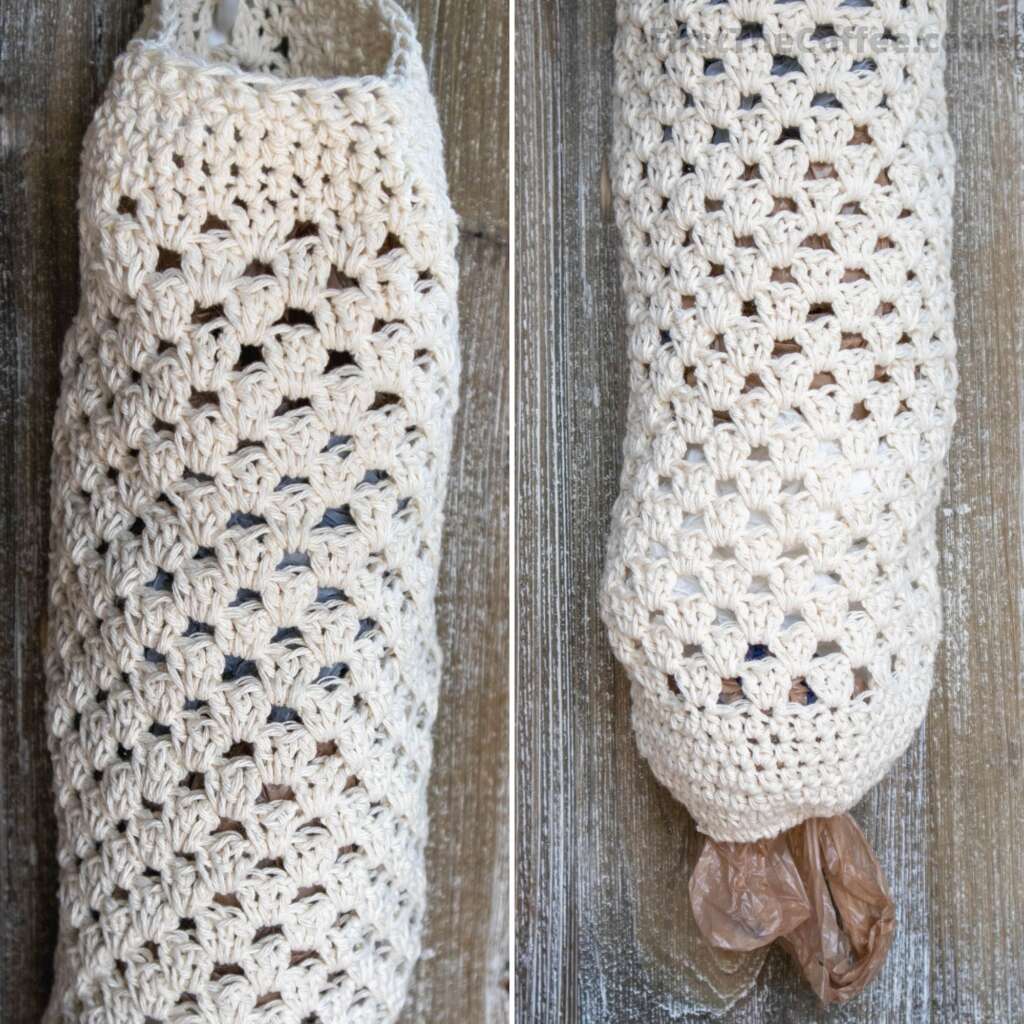
This bag holder will allow you to easily hang it from the doorknob or a hook, keeping the bags up and out of your way. You can keep them in a pantry, cabinet or on a hook right were you need them for easy access. I keep mine in the cat’s room for easy clean up in litter boxes when needed.
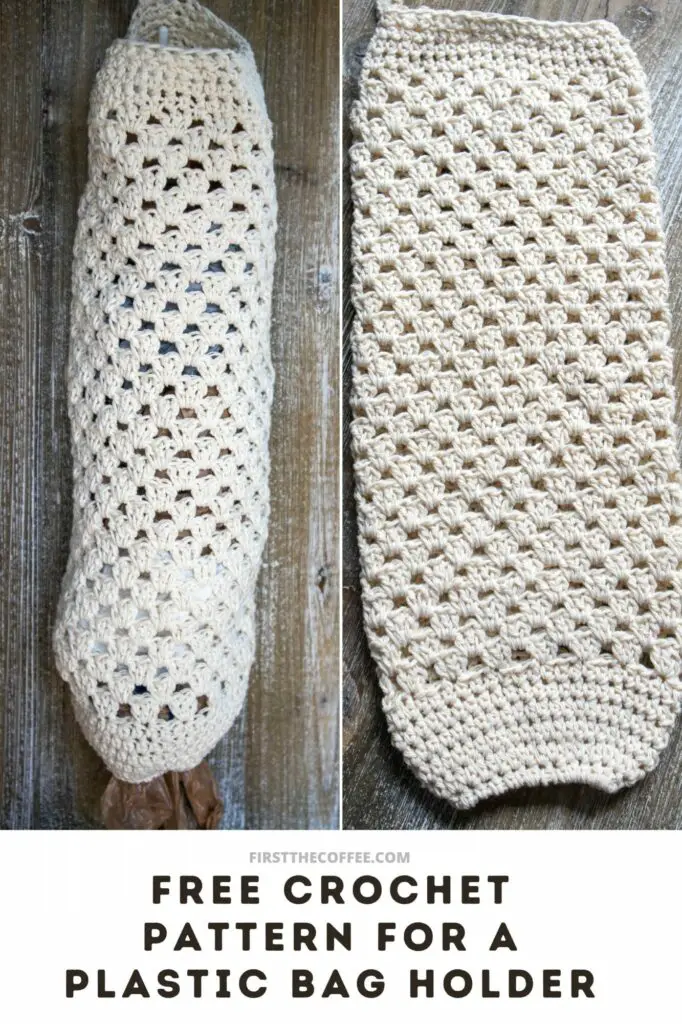
Using the iconic granny stitch as the main pattern repeat, this crochet bag holder is both functional and visually appealing and super easy to stitch up.
All you need to make this bag holder is 245 yards of medium 4-weight cotton yarn and a 5.50 mm crochet hook.
More Free Crochet Plastic Bag Holder Patterns
Farmhouse Style Bag Dispenser
Mini Bean Bag Storer Pattern
Ad-Free PDF Patterns Are Available:
The full written pattern and video are available below with display ads. But if you would like a written ad-free PDF to add to your pattern collection you can do so by purchasing one from my Ravelry shop or Etsy shop.
All PDF Patterns are 20% off when you buy 3 patterns on Ravelry or Etsy.
Please note that this post may contain affiliate links. You can read my full affiliate disclosure at the bottom of the page.
Quick and Easy Bag Holder
What makes this pattern even better is that with a few skeins of cotton yarn and a few hours, you can stitch up this bag holder in no time. So if you’re looking for a last minute handmade gift idea, this can be perfect for someone who always keeps their grocery store bags and needs a place to store them.
Yarn
While this pattern does call for #4 medium worsted weight cotton yarn, you can use acrylic if you would like. Just be aware the acrylic will stretch more over time and as this bag holder is used.
Cotton yarn also gives it a nice clean look, making it a great choice of yarn for matching many home decor styles.
Cotton Yarn Options
If you’re looking for some good choices of cotton yarns to choose from for this pattern, here are a few brands that I use for many of my home organization crochet items:
- Lily’s Sugar & Cream Yarn
- Loops & Threads Capri Eco Cotton
- Lion Brand 24/7 Cotton Yarn
- Lion Brand Re-Up Bonus Bundle Yarn
Notes:
- This crochet pattern is written in US terms.
- This pattern is worked in the round all in one piece.
- The initial chain at the start of each round does not count as a stitch unless noted.
- Finished size: 18″ long x 7″ wide when laid out flat.
- You can make this bag holder taller by increasing the number of repeat rows of the granny stitch.
- The handle/hanger is adjustable by increasing the number of chains and single crochet stitches that you use in it.
Materials:
- 245 yards of medium 4-weight cotton yarn
- Yarn used: 2 skeins Loops & Threads Capri Eco Cotton
- 5.50 mm crochet hook
- Yarn needle to weave in ends.
- Stitch markers
- Scissors

Crochet Abbreviations Used (US Terms):
- st/sts – stitch/stitches
- sl st – slip stitch
- ch – chain
- sc – single crochet
- sc2tog – single crochet two together
- hdc – half double crochet
- dc – double crochet
- x – times (ex 2x = two times)
Special Stitch Instructions:
sc2tog – insert hook into next stitch, yarn over and pull up a loop, insert hook into the following stitch, yarn over and pull a loop, yarn over again, and pull through all 3 loops on your hook.
Free Crochet Bag Holder Pattern Video Tutorial
Free Crochet Bag Holder Pattern With Pictures:
Base/Foundation: ch 20, join 1st and last st of chain with as sl st
Round 1: ch 1, hdc 30 times into the ring all around foundation chain, join last hdc with 1st hdc of the round with a sl st (30 stitches)
Round 2: ch 1, starting in 1st stitch: [hdc in next stitch, hdc 2x in next stitch]15x, join last hdc with 1st hdc of the round with a sl st (45 stitches)
Rounds 3 – 6: ch 1, starting in 1st st: hdc in each st all the way around, join last hdc with 1st hdc of the round with a sl st (45 stitches)
Round 7: ch 1, sc in the 1st st, ch 1 (counts as 1st dc), dc 2x in the same st, * skip 2 sts, dc 3x in the next st, repeat from * 13 more times, sl st last dc to the top ch 1 of the 1st dc in the round to join (45 stitches)

Rounds 8 – 36 : ch 1, [ sc, ch 1 (counts as 1st dc), dc 2x] into the space between the 3 dc groups that is before the previous row’s 1st st, * dc 3x into next space between 3 dc groups, repeat from * 13 more times, sl st last dc to the top ch 1 of the 1st dc in the round to join (45 stitches)


Round 37: ch 1, skip 1st st, * hdc in each of the next 2 sts, hdc in next space between the 3 dc groups, skip next st, repeat from * 14 more times, join last hdc with 1st hdc of the round with a sl st (45 stitches)

Round 38: ch 1, starting in 1st stitch: hdc in each stitch all the way around, join last hdc with 1st hdc of the round with a sl st (45 stitches)
Round 39: ch 1, (starting in the 1st stitch) * hdc in the next stitch, sc2tog over the next 2 stitches, repeat from * all around, join last sc2tog with 1st hdc of the round with a sl st (30 stitches)
Round 40: ch 1, starting in 1st stitch: hdc in each stitch all the way around, join last hdc with 1st hdc of the round with a sl st (30 stitches)
Top Ring/Ring for Hanging:
Base: starting from Round 40, ch 1, (starting in the 1st st) sc in each of the next 4 stitches

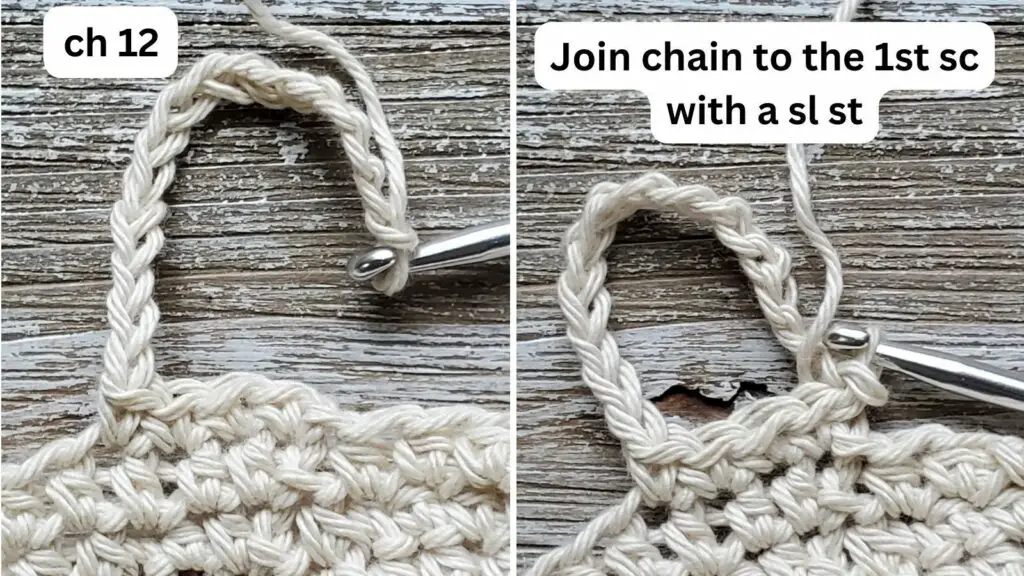
Round 1: ch 12, sl st to join chain to the 1st sc of the 4 sc of the base of the ring. (This will create a loop)
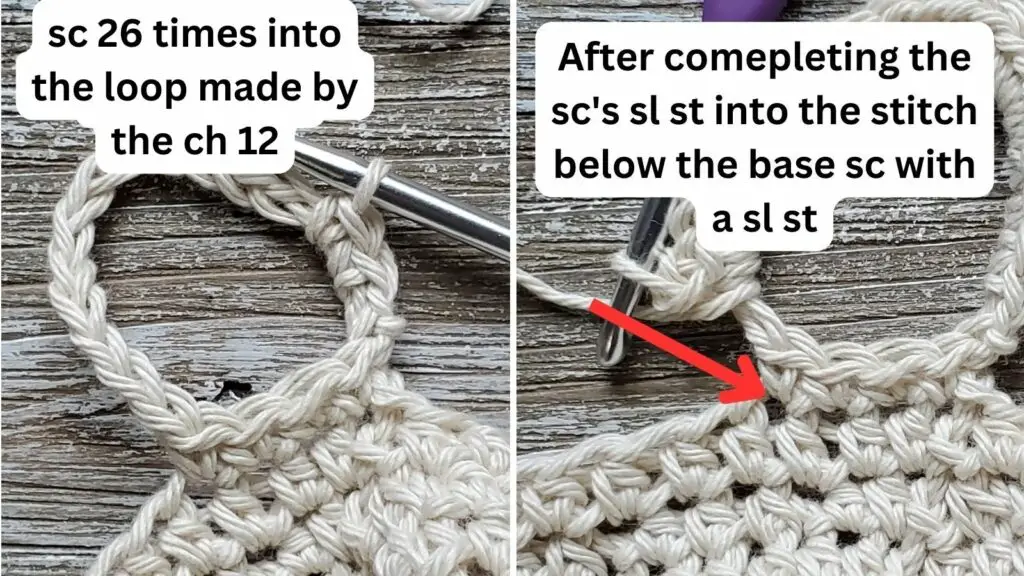
Round 2: ch 1 and sc 26 times into the loop going back in the direction you just chained, sl st to the stitch after Row 1 that is in the Round 43.
Fasten off and weave in your ends.
Share Your Work
Have you made this pattern? Let us know by tagging @firstthe_coffee on Instagram. You can also join FirstTheCoffee’s Facebook Group and show off your crochet projects.
Copyright
You may not copy, make video tutorials of, or sell my patterns. You may not claim my patterns as your own. You can sell your finished items made using my patterns but please credit FirstTheCoffee.com by linking back to this pattern. You may not re-publish my photos as your own. If you are interested in using one of my patterns in a roundup post on your blog, you can use one photo and link back to the pattern on my blog. Do not repost/copy the pattern.